Ceiling suspension with plastic-coated steel cables
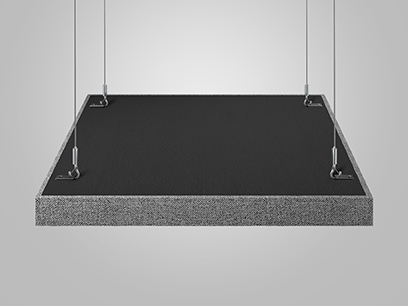
It is possible to install the Phonolook Solution and Phonolook 3D panels suspended from the ceiling using plastic-coated steel cables and clamps with hooks, supplied in the relative fixing kit, allowing soundproofing to be activated on both sides. For this the panel is already equipped with special brackets with holes positioned on the back side of the wooden panel. If in metal, the holes are positioned on the perimeter frame of the panel in the corners.
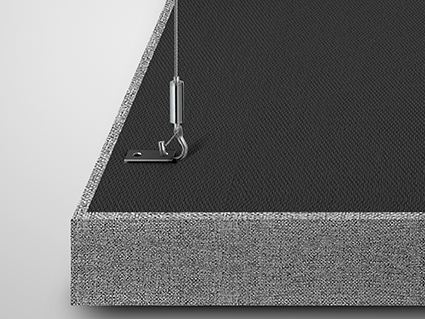
The special clamps with steel hook, supplied inside the fixing kit, are hooked into the corresponding holes provided on the rear side of the panel ensuring the coupling and sealing of the product in suspension.
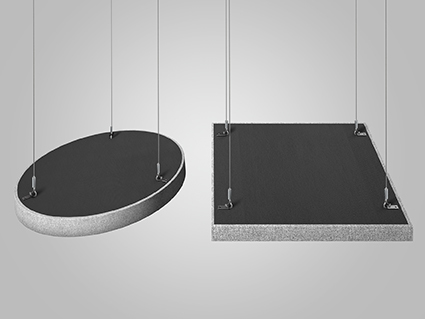
Easy and fast, the system with suspension cables makes it possible to adjust the distance between the ceiling and the panel directly on sight, thus giving the possibility of applying the panels at different heights and with different angles of inclination, with complete freedom.
Application in adherence to ceiling and / or wall with magnet
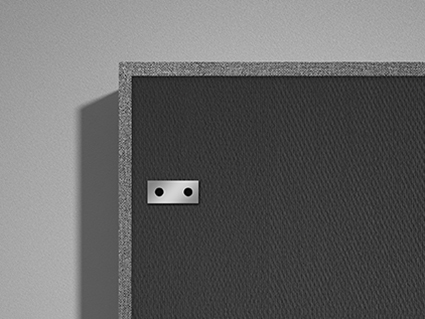
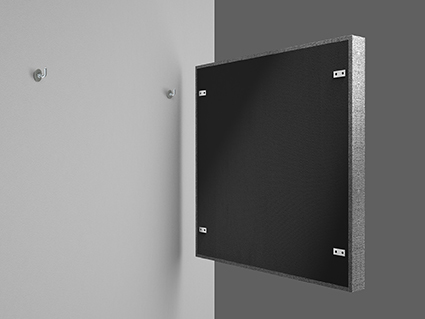
Each panel of the Phonolook Solution and Phonolook 3D lines can be installed in adherence to the ceiling and / or to the wall using a magnetic fixing system composed of metal plates and magnets, supplied in the relative fixing kit.
The panel is equipped with special metal plates positioned on the rear side to be coupled with the circular magnets supplied in the kit, after fixing them to the ceiling or wall with plug, to apply the product in adherence to the chosen surface.
The Phonolook Solution panel is applied in adherence to the wall within minutes, offering your environments maximum sound absorption performance with an aesthetic touch that will not go unnoticed.
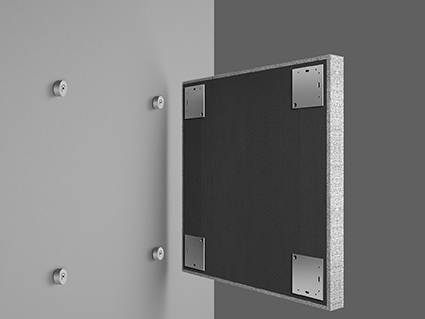
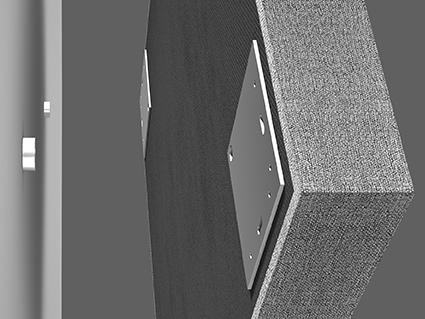
Application in adherence to the wall with "L" brackets and plugs
Each wooden panel of the Phonolook Solution and Phonolook 3D lines can be installed in adherence to the wall also by means of a fixing system composed of “L” brackets, supplied in the relative fixing kit. The plugs to be installed on the chosen wall will depend from the customer's needs.
The dowels must be applied to the selected wall in correspondence with the holes positioned on the rear side of the panel on the brackets. You can then proceed to insert the dowels in the coupling holes positioned on the panel, for a quick and fast application.
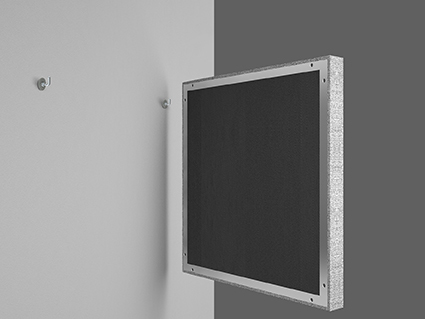
The application as wall panels is also possible for each of the metal panels of the Phonolook Solution and Phonolook 3D lines. In this case, the dowels must be inserted directly into the holes on the rear side of the panel on the metal perimeter frame.
The panel is applied in a few minutes to a wall, using a simple and versatile system, suitable for any type of surface, which recalls the classic one of the paintings.